This is my favorite meal ever. No joking. My mom has been making this since I was a little girl. This was what all of the kids in my family picked for their birthday dinner. If I had to pick one dish to remind me of my home growing up, this is it. I love it.
It is from the cookbook titled Make-A-Mix Cookery. It is a great cookbook - that I seem to have borrowed from my mom about 10 years ago - that has many great meals. It is written by 3 moms who were trying to make more time for their families and still make good dinners. They are the original mix makers! They teach you how to make and prepare a mix and make it work for many meals. I found some copies of their book on Amazon if you are interested. Ours is well worn and I think I may break it out again and see what new things I can find!
In this meal, you cook up one large roast and then freeze it in 3 cup portions to make 3 separate meals. Our favorite is the Chimmichangas, but it also makes an amazing Chalupa (thick soup) that everyone loves.
Mexican Meat Mix
5 lbs. beef roast or combination of beef & pork roast
3 Tbs. vegetable shortening
3 onions, chopped
1 (4 oz.) can chopped green chilies
2 (7 oz) cans green chili salsa
1/4 tsp. garlic powder
4 Tbs. flour
4 tsp. salt
1 tsp. ground cumin
Juices from beef roast
Preheat oven to 200 degrees and place the roast in a large roasting pan. Cover with a tight lid and roast about 12 hours, until well done. OR cook all day in crock pot until it shreds easily.
Drain the juices and set aside for later. Cool the meat and then remove any bones. Shred the meat and then set aside.
Melt the shortening in a large pot. Add the onions and green chilies & saute 1 minute. Add the green chili salsa, garlic powder, flour, salt and cumin. Cook 1 minute over medium-low heat. Stir in the reserved juices and shredded meat and cook another 5 minutes, until thick. This will smell so good! At this point, I usually have the chips out for a nice snack!
Cool the meat and put about 3 cups mix into 3 freezer zip-lock bags. Seal, label and use within 6 months.
For the chimmis, we grab a bag out of the freezer in the morning and let it defrost in the refrigerator. Take the meat out of the zip-lock bag and heat up in the microwave. Put a little bit in a tortilla and roll up. I took some pictures of my hubby as he rolled up the tortilla...
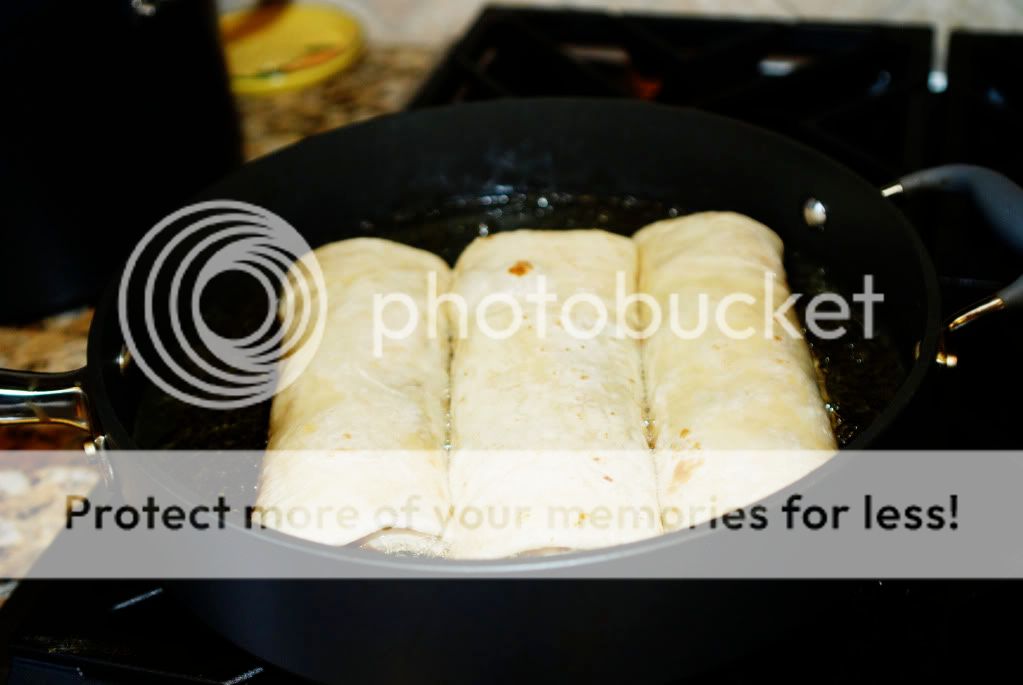
 Put a little canola oil in a skillet and heat up until popping. Add the rolled up tortillas and then flip them when they are golden.
 They should look like this when they are done! SO GOOD! You could always make it a little healthier and bake them instead, but why? They are way to good this way.
 Put them on a bed of shredded lettuce and then top with your favorite toppings. We like tomato, cheese, cilantro, green onion, guacamole and sour cream.

Put a little canola oil in a skillet and heat up until popping. Add the rolled up tortillas and then flip them when they are golden.They should look like this when they are done! SO GOOD! You could always make it a little healthier and bake them instead, but why? They are way to good this way.Put them on a bed of shredded lettuce and then top with your favorite toppings. We like tomato, cheese, cilantro, green onion, guacamole and sour cream.