Showing posts with label dessert. Show all posts

4/30/2012

Cake Batter Balls

Photobucket
We had a fun party for my sister - she turned the big 30! It was a great time with family and we had lots of yummy food, which always means it was a success!

I was in charge of helping decorate and making some of the treats. I immediately thought of these cake batter balls I have made a several times in the last couple months ago. They are a HUGE hit every time I make them. In fact, my kids recognized the ingredients and were doing a happy dance while I was making them. I have decided that I can only make them for a specific purpose so they aren't left at my house for me to eat!

We put them in some of my mom's beautiful jars and they looked so festive! Sprinkles always mean a party, right!!


Photobucket


Cake Batter Truffles

Recipe from: The Sweet life
Print here

1 1/2 cups flour
1 cup yellow cake mix
1/2 cup unsalted butter, softened
1/2 cup white sugar
1 tsp vanilla
1/8 tsp salt
3-4 tbsp milk
2 tbsp sprinkles
16 oz (8 squares) white almond bark
4 tbsp yellow cake mix
sprinkles, for decoration

Beat together butter and sugar with an electric mixer until combined. Add cake mix, flour, salt, and vanilla, mixing well. Add milk and beat until a dough consistency forms. Stir in sprinkles.

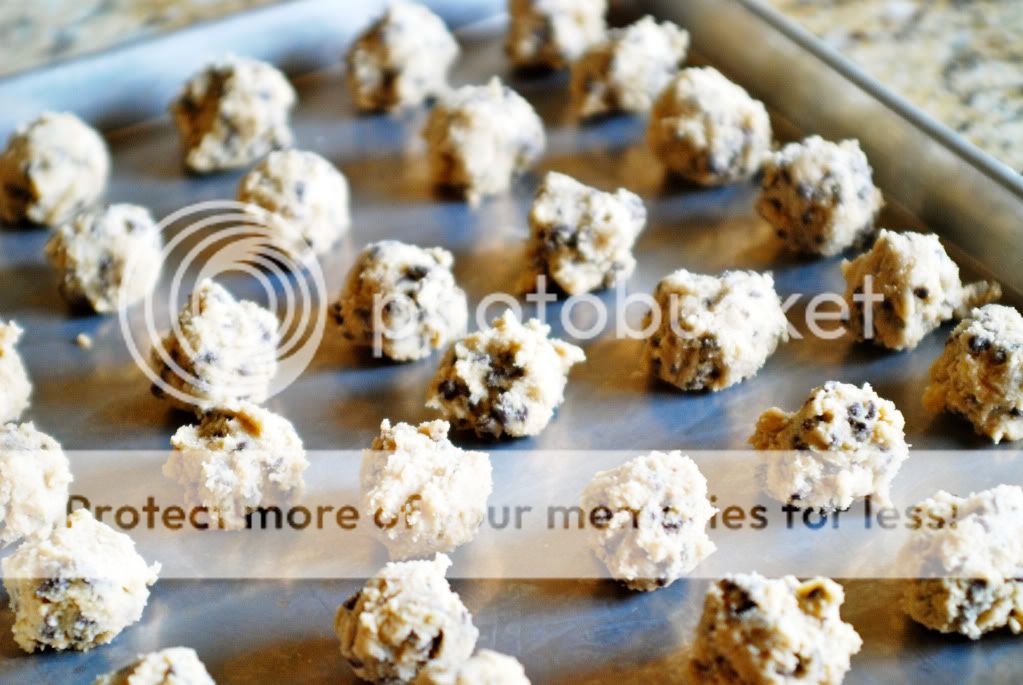
Roll dough into one-inch balls. Place on a cookie sheet lined with wax or parchment paper. Chill for 15 minutes in the fridge or freezer. I actually left mine in the freezer overnight, which worked out fine. I just had to dip & put on the sprinkles really fast because the chocolate was hardening quick!

Melt almond bark in the microwave in 30-second increments, stirring after each increment. When bark is smooth and melted, stir in cake mix until smooth.

Dip cake batter balls in almond bark to coat completely. Remove with a fork and place on wax or parchment paper lined baking sheet. Decorate immediately with sprinkles. Store in an airtight container in the fridge.


Photobucket

3/28/2012

Cinnamon Coffee Cake

Photobucket

I have been seeing so many good things floating around on Pinterest lately. I always find myself gravitating toward the food - no surprise there! I decided that I am going to actually make some of the things that look good to me. And if I like them, then I will share them with you!

I was trying to think of a good dessert the other night & my mind kept going back to this cake. It was perfect because we were all out of ice cream and I knew this would go well with a tall glass of milk. It was really easy to make and had a wonderful texture - the two batters mixed together made it light and dense at the same time. My family LOVED it and kept going back for more! I had to quickly grab a piece to take a picture before it was all gone.

This cake would be really great for breakfast. You could make it ahead of time also and serve it cold or warmed up, either way tastes great! I will definitely be making this again, thank you Pinterest!


Cinnamon Coffee Cake
recipe from: Chef in Training
Print here

CAKE:
3 cups Flour
1/4 teaspoon Salt
1 cup Sugar
4 teaspoons Baking Powder
1 1/2 cups Milk
2 Eggs
2 teaspoons Vanilla
1/2 cup (1 stick) melted butter

TOPPING:
1 cup (2 sticks) soft butter
1 cup Brown Sugar
2 tablespoons Flour
1 tablespoon Cinnamon

GLAZE:
2 cups Powdered Sugar
5 tablespoons Milk
1 teaspoon Vanilla

Preheat oven to 350 degrees. Spray a 9×13 glass baking pan with cooking spray. Set aside.

Mix together the flour, salt, sugar, baking powder, milk, eggs, and vanilla. Once combined well , slowly stir in the melted butter. Pour into the prepared 9×13 baking pan.

To make the topping, combine the 2 sticks of butter, brown sugar, flour and cinnamon together until well combined and creamy. Drop evenly over the batter by the tablespoonfuls and use a knife to marble/swirl through the cake.

Bake at 350 for 28-32 minutes or when a toothpick inserted near the center comes out nearly clean.

FOR GLAZE: In a medium bowl, mix the powdered sugar, milk and vanilla together with a whisk. Drizzle evenly over the warm cake.

3/16/2012

Cake Batter Rice Krispy Treats

Photobucket

My good friend Raimi gave me this recipe. Well, actually she made them for my daughter at church, I took the last couple bites of her second serving & then begged for the recipe. They are so good.

I have always been a big fan of rice krispy treats. I remember in the dorms at college eating the rice krispy treat and the snickerdoodle everyday after dinner. Seriously, everyday. And they were big, thick gooey treats - not wimpy or dry at all. I can't stand a wimpy rice krispy treat.

This one is a champ. It should be too, with cake batter & all of the sprinkles! Sprinkles make everything good.

Cake Batter Rice Krispy Treats
Printable Recipe here

3 Tbs. butter
6 cups Rice Krispies
1/3 cups yellow or white cake batter dry mix (unprepared)
1 bag - 10 oz. mini marshmallows
1 jar (1.75 oz ) multicolored sprinkles

*optional - I added a jar of the marshmallow fluff to mine to make it really gooey! Just add it to the pan when the marshmallows are almost all melted.

In a large saucepan, heat butter and marshmallows on low until melted.
Slowly, add dry cake mix, one small scoop at a time to the melted marshmallows. Don't dump them all in! It will lump up and won't be as smooth.

In a separate bowl, add 6 cups of Rice Krispies. Fold in the melted marshmallows and half of the jar of sprinkles.

Press them into a well greased baking dish. I like to spray my hand with Pam before I do this step because then I can really press them into the pan well without it sticking to my hand and pulling back up.

This is the fun part! You can make them big & fat like I like them by putting them into a smaller dish or you can make them skinny by putting them in a 9x13 pan. Either way is yummy! Top them off with the rest of the sprinkles. Let them sit and cool off for a little bit before you cut into them. I never wait too long :)

11/08/2010

Chocolate Raspberry Cupcakes


I am so excited to be posting again! My computer hasn't been working too well - I had an interim hard drive for months that wouldn't allow me to do anything. I am happy to say that I think it has been fixed and won't happen again. I have to give a big thank you to some of you who have been so nice and written me or posted a note letting me know you are there. A special thanks to Allison, Deborah Brown, Justanordinarygirl & Sara! I am sorry I didn't respond to you guys - I am back now!

I made these cupcakes for a wedding shower over the summer & it got such a great response that I made them again for my husband's birthday. We loved them! They are chocolate cupcakes with a "secret" filling of raspberries. If you like the combination of chocolate and raspberries, then these are for you. Especially with the chocolate cream cheese frosting - anything would taste good frosted with this frosting!

Chocolate Raspberry Cupcakes

1/2 cup (1 stick) butter, room temp

1-1/4 cups sugar

2 large eggs, room temp

3/4 cup flour

1/2 teaspoon baking powder

1/4 teaspoon baking soda

1/4 teaspoon salt

1/2 cup unsweetened cocoa powder

1/2 cup milk

1 teaspoons vanilla

1 cup sour cream

1 cup chocolate chips


Raspberry Filling

2 bags frozen raspberries

1/4 cup sugar


Chocolate Cream Cheese Frosting

8 oz. cream cheese

1 stick unsalted butter, room temperature

1/2 cups cocoa powder, unsweetened

1 tsp. vanilla

4 cups powdered sugar, sifted


Preheat oven to 375F degrees.

Beat butter until softened. Add sugar and beat until light and fluffy, about 3 minutes. Add eggs, one at a time, beating until well combined.

Measure the flour, baking powder, baking soda, salt, and cocoa powder into a small sized bowl and whisk to combine. Measure out the milk, vanilla and sour cream and stir to combine.

Add about a third of the dry ingredients to the butter/sugar and beat to combine. Add about a half of the milk/vanilla and beat to combine. Continue adding, alternating between dry and wet and finishing with the dry. Mix in the chocolate chips.

Scoop batter into cupcake liners 2/3s full. Turn oven down to 350 degrees and bake cupcakes for about 22-25 minutes or until a toothpick comes out clean.

While the cupcakes are cooling, puree the raspberries (leave them a little bit thick) and then mix in the sugar. You can taste the filling to see if it is sweet enough for you and adjust the sugar accordingly. Fill a pastry bag with the filling and put a regular tip on it and place it directly in the center of the cupcake. Press out filling while slowly pulling the bag up and out. It will look like this...

After you are done filling the cupcakes, blend the cream cheese and butter on low until creamy. Add the cocoa, vanilla and sugar on low until moist. Increase the speed and beat until fluffy. Don't forget to sift the sugar! It really makes a big difference in the texture of the frosting.

Pipe it onto the cupcake to cover up the raspberry filling and garnish with a fresh raspberry. They are pretty and delicious!


7/06/2010

Best Cinnamon Rolls!

I started making cinnamon rolls when I was 15. I got a job at a little bakery and learned how to make them from scratch. They are great and I haven't wanted to try any other recipe until I found the Pioneer Woman blog. Her cinnamon rolls are her top rated recipe and they get such great reviews. I knew I had to give them a try.

So, for Fathers Day I made them & I love them. I don't know if I can go back. They are amazing. They make A LOT of rolls, I made 6 tins full (I froze 2 for later.) The dough is light and just melts in your mouth. The frosting is what made it absolutely sinful. I felt like I had made the best donuts ever, it tasted just like donut maple frosting.

It is nice also because you make the dough the night before and then roll them out in the morning. It took me about an hour and a half in the morning from start to bite! I will be making these many more times & can't wait to try them out of the freezer!

I am linking to Pioneer Woman for this recipe. She has amazing step-by-step instructions for you! The only difference I made was not adding the coffee in the frosting, it didn't need it!

Best Cinnamon Rolls Ever!

Pioneer Woman Recipe
Yum!!
Don't they all look pretty!!

Don't skimp on the frosting!!

4/23/2010

Oreo Balls

Every time I see the title of this recipe it makes me giggle and think of the old Saturday Night Live skit with Alec Baldwin. Remember Pete Schweaty?

These goodies have been making their way around on the blogs for a while now and I assumed no one would want me to post this recipe. But, after making them a couple months ago, a couple of my friends keep asking for me to post the directions. They are so easy! And they are so addicting. I think I eat at least 10 every time I make them!

You can make them with a little variety too. Try a different type of cookie - if you look closely at the bottom picture, you can see a little red in the middle from when I tried these with the Christmas peppermint Oreos!

Oreo Balls

1 box Oreo cookies
1, 8 oz. block of cream cheese, softened
white chocolate bark

Start by smashing the oreos into crumbs. Put them into a medium size mixing bowl and combine with the cream cheese. You will have to take off your rings for this one, it gets a little messy. Combine well and then form into 1 inch balls. Line a cookie sheet with wax paper and place the balls onto the cookie sheet. Freeze them for a couple of hours until they are frozen solid. Dip them into the melted white chocolate bark (I got mine cheap at Wal-mart) and then place them back on the wax paper to harden.

If you don't have any chocolate to dip or don't have the time - you can save some of oreo crumbs and dip the balls into the crumbs before the freezing step. Or, just eat them straight out of the freezer. Any way you eat it will be great. Promise.


4/02/2010

Chocolate Chip Cookie Dough Cupcakes

I am sorry it has been a while...there has been a lot going on over here! I have been wanting to share this recipe for a long time, I think everyone will love it.

I made these when I was craving sweetness & I sure got what I wanted. They are super sweet! I thought they were the best the second day right out of the fridge - it made the cookie dough harden again and was so yummy. They are really easy! They can be made with this dough recipe or you can just save a little next time you make some of your favorite cookies. If you are a cookie dough lover, give these a try!

Chocolate Chip Cookie Dough Cupcake

1 1/2 cups flour
1/4 tsp. baking soda
1/4 salt
1/2 cups soft butter
1/4 cup sugar
1/2 brown sugar
1 egg
2 tsp. vanilla extract
1 cup mini chocolate chips

1 box white cake mix
1 1/3 cups water
1/3 cup canola oil
3 eggs

Mix together the flour, baking soda and salt in a medium size bowl and set aside. In another bowl, beat the butter, sugar and brown sugar until smooth and then blend in the egg and vanilla. Mix in the flour mixture until just blended. Fold in the chocolate chips and then form the dough into tablespoon-sized balls. Place on baking sheet and freeze for at least 2 hours or overnight.


After the dough has been frozen, preheat the oven to 350 degrees and line the muffin cups with paper liners or non-stick spray.

Beat cake mix, water, oil and eggs until well blended. Spoon into the muffin tins, filling 2/3 full. Place a frozen cookie dough ball in the top center of each cupcake.


Bake in the oven for approximately 20 minutes & until a toothpick comes out clean (not in the cookie dough ball!). Frost and enjoy! Here is a picture of the yummy cookie dough middle.

2/19/2010

Cream Puffs


I got this recipe from one of my best childhood friends, Cami. It is without a doubt one of my very favorite recipes. My family requests it all the time. My kids have asked for this a couple times instead of birthday cake. So, they get a really big puff with a candle! My oldest asked my mom the other day what her very favorite dessert was and she said these cream puffs. They are wonderful.

Cream Puffs

1/2 cup water
1/4 cups butter
1/2 cup flour
1/4 tsp. salt
2 eggs
1 package vanilla pudding mix
1 tub cool whip
chocolate chips

Pre-heat the oven to 400 degrees and grease a cookie sheet.

In a medium saucepan, combine the water and butter and bring to a boil over medium heat (like the first picture). Stir in the flour and salt, cook, stir well until mixture leaves the sides of the pan in a smooth ball (like second picture). Then remove the pan from the heat.

Add eggs one at a time, mixing very well after each addition until the mixture is smooth and glossy. It might take a minute, but it will get there. And if you triple the recipe like I always do - then you may have a little bit of a tired arm!

Spoon 6 mounds of the dough 3 inches apart onto the cookie sheet. I just use a large spoon and plop it onto the sheet. I like the puffs to be a little uneven, with personality!

Bake them for 30 minutes or until the tops are golden brown. Immediately prick them with a sharp knife to allow steam to escape - dont forget! Remove from the cookie sheet - I just always transfer them to another cool one - and allow them to cool completely.

Open up the top of the puff and if it is too dense, remove some of the inside dough (like the first picture). Prepare the vanilla pudding according to directions on the box and after it has set up, mix it with a tub of cool whip. Really, you should just lightly fold the two together or the mixture can become a little runny. Fill the puffs with the pudding mixture (like second picture!) I like to use the sugar free pudding and the fat free cool whip - you can't tell the difference and it makes me feel a little less guilty.


Put some chocolate chips into a microwavable bowl and melt them until smooth. I start with 30 seconds, then 20 and then do it in 15 second intervals until smooth. Coat the top of the cream puff with melted chocolate and allow them to harden up in the fridge.

We like to eat them by taking off the top and eating the chocolate part first. Who am I kidding, we like to eat them any way. Once, when we were newlyweds I doubled the recipe one Sunday afternoon and Pete and I ate all 12 of them. It was a great Sunday.

2/12/2010

Peanut Butter Bars

I had to make a treat for pre-school today and decided to make these bars I saw on Allrecipes. They are no-bake, peanut butter, graham crackers & chocolate - all my favorites! Oh my gosh! They are so yummy. I have made peanut butter bars before and these are definitely the best I have ever made. They are thick and dense and have just the right amount of peanut butter taste, not too overpowering. I need to get them out of my house quickly.

Peanut Butter Bars

  • 1 cup butter or margarine, melted
  • 2 cups graham cracker crumbs
  • 2 cups confectioners' sugar
  • 1 cup peanut butter
  • 1 1/2 cups semisweet chocolate chips
  • 4 tablespoons peanut butter

  • In a medium bowl, mix together the butter or margarine, graham cracker crumbs, confectioners' sugar, and 1 cup peanut butter until well blended. Press evenly into the bottom of an ungreased 9x13 inch pan.

  • In the microwave, melt the chocolate chips with the peanut butter, stirring occasionally until smooth. I started with 30 seconds, mixed and then cooked at 15 seconds intervals until melted and smooth. Spread over the prepared crust. Refrigerate for at least one hour before cutting into squares.


Give them a try and see if you can stop eating them!

11/06/2009

Apple Bars

I love the fall time when you can start baking with all of the apples and pumpkins! It is not good though, because I love to eat just as much as I love to bake.
I found this recipe so I could make something new with all of the apples we got at "Apple Hill" here in Cali. And oh my... it is perfect. In fact, it is so yummy I think I polished off about 3/4 of it myself. No exaggeration.

Apple Bars

2 cups flour
2 tsp. baking powder
1/2 tsp. salt
1/2 tsp. ground cinnamon
1/2 cup melted butter
1 cup packed brown sugar
1 cup white sugar
2 eggs
2 tsp. vanilla extract
1 cup peeled and chopped apple
1 cup chopped nuts (optional)
2 Tbs. white sugar
2 tsp. ground cinnamon
** Caramel ice-cream topping

Preheat the oven to 350 degrees and grease a 9x13 pan. Sift together the flour, baking powder, salt and 1/2 tsp. cinnamon and set aside.

In a large bowl, mix together the butter, and sugars until smooth. Stir in the eggs and vanilla. It should look nice and smooth, like this...


Blend in the flour mixture into the eggs and butter until just combined. Stir in the apples and walnuts. This is the mixture right before I put in the apples - you can see how much thicker the batter is now.


Spread the mixture evenly into the greased pan. In a little bowl, stir together the remaining cinnamon and sugar & then sprinkle over the bars. Doesn't it already look delicious!

Bake for 30 minutes or until the bars spring back when touched. Cool in the pan and then cut into bars. For an extra little sweet I ran some caramel ice-cream topping over the top of mine! Wow, sooo good! I have been wanting to make them again, but am positive my will power will leave me again!

8/18/2009

Blueberry Crumb Bars

I saw these bars on a blog last week and immediately knew I needed to try them. I have become addicted to blueberries lately, I put them on everything. I am a big cobbler fan also (what am I not a fan of?) so to combine blueberries and cobbler is YUM!

I have found a new favorite recipe. We ate it warm out of the oven with some vanilla ice cream and it was sooo good. I thought it couldn't get much better until I took a piece out of the fridge the next morning - yes, I ate a piece for breakfast! And it was even better cold! I am not allowed to make any more now. I have no will power.

I got this recipe from the blog yourhomebasedmom. She has lots of great recipes!

1 cup white sugar
1 tsp. baking powder
3 cups all-purpose flour
1 cup cold butter (2 sticks)
1 egg
1/4 tsp. salt
zest and juice of one lemon
4 cups fresh or frozen blueberries
1/2 cup white sugar
4 tsp. cornstarch

Preheat your oven to 375 degrees and grease a 9x13 pan.

Stir together the first three ingredients. Mix in the salt and lemon zest. Use a fork or pastry cutter to blend in the butter and egg. Pat half of the dough in the pan. It is okay if it is a little crumbly, just press it with your fingers until it looks like this.


In another bowl, stir together the sugar, cornstarch and lemon juice. Mix in the blueberries. I had some fresh berries but not enough, so I just substituted the remaining amount with frozen blueberries. I didn't even thaw them out! Layer the blueberry mixture over the dough in the pan.

Crumble the remaining dough over the top. It will already look pretty!


Bake in the preheated oven for 45 minutes or until the top is golden.

Eat warm with ice cream or wait until it is cool and cut into bars. Just try not to eat them for every meal!

7/06/2009

Chocolate zucchini cake

This cake reminds me of summer.  My parents always have a great garden in the summer and give me lots of zucchini.  I love to make zucchini bread and when my mom gave me this recipe about 7 years ago, I knew it would be good too.   I have been making it ever since.  I like to shred a couple of zucchini, bag up the correct amounts and put it in the fridge or freezer to make this quickly.


Chocolate Zucchini Cake
1/2 cup soft butter
1/2 cup oil
1  3/4 cup sugar
2 eggs
1/2 tsp. vanilla
1/2 cup milk, mixed with 1 Tbsp. vinegar (or buttermilk)
4 Tbsp. cocoa
2 1/2 cups flour
1 tsp. baking soda
1 tsp. baking powder
1/2 tsp. cinnamon
2 cups shredded raw zucchini (with the peel)
1/2 cups chocolate chips ( or maybe more!)

The first thing you need to do is mix the 1 Tbsp. vinegar in the milk in a small bowl.  Let it sit for a couple minutes on the side.  You will notice it starts to make the milk curdle a little, that is exactly what you want.  This is a substitute for buttermilk!  If you happen to have buttermilk, you can skip this whole step - but it is nice to know a substitute, I have needed it often!

Next, cream the butter, oil, sugar, eggs and vanilla in your mixer.  Add the rest of the ingredients up to the zucchini and mix quickly.  When the dry ingredients have mixed in, add the zucchini and mix well.

Pour into a greased 9x13 pan and sprinkle with chocolate chips!  However many you like!  Bake at 325 degrees for 45-50 minutes.

Enjoy!  It tastes great warm with a little bit of ice cream.  But, I also love to eat it cold for breakfast - you cant go wrong!