12/07/2010

Homemade Pizza

One of my very best friends, Stephanie, gave me this recipe. She told me a couple times about this pizza and how easy & fast it was. I wasn't sure what her definition of "easy" was until she told me it takes about 15 minutes to make it! That is my kind of easy. I knew I had to try it too. I have always had a hard time with pizza dough - I never found the recipe that made the kind I liked. Well, I am happy to say that I have an easy, new favorite! I have made this recipe about 5 times now and my whole family loves it. And I love that I can make it quickly - the only thing I need to plan ahead for is to make sure I have mozarella cheese!

Homemade Pizza Dough Recipe

2 1/2 c. flour
1 Tbsp. sugar
1 tsp. salt
1 cup hot water (120-130°)
1 Tbsp. Rapid Rise or Bread Machine yeast
2 Tbsp. olive oil


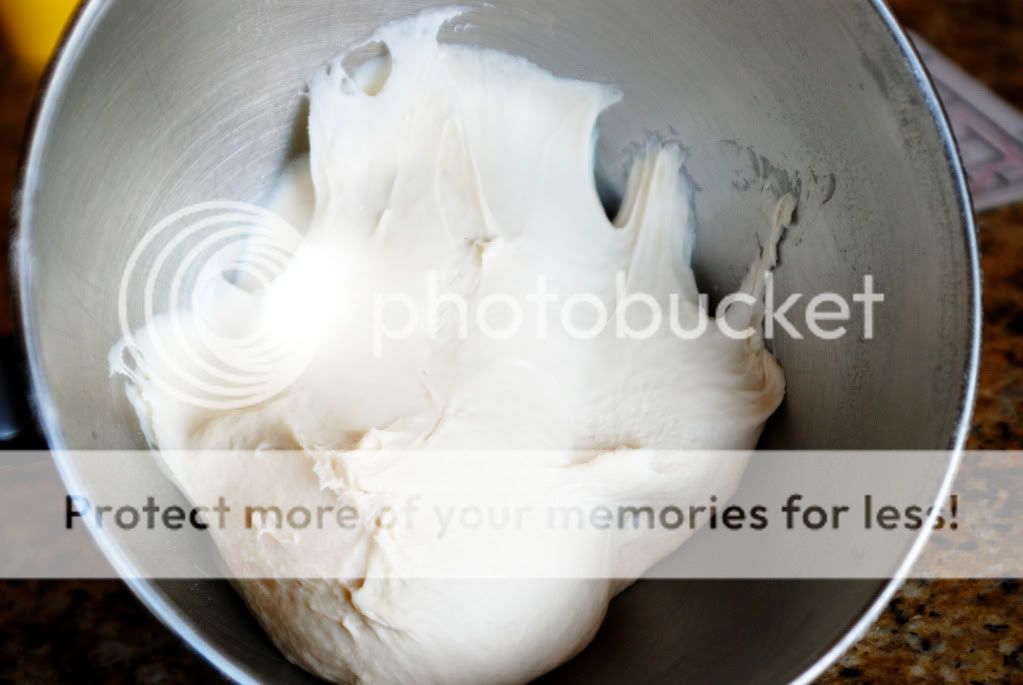
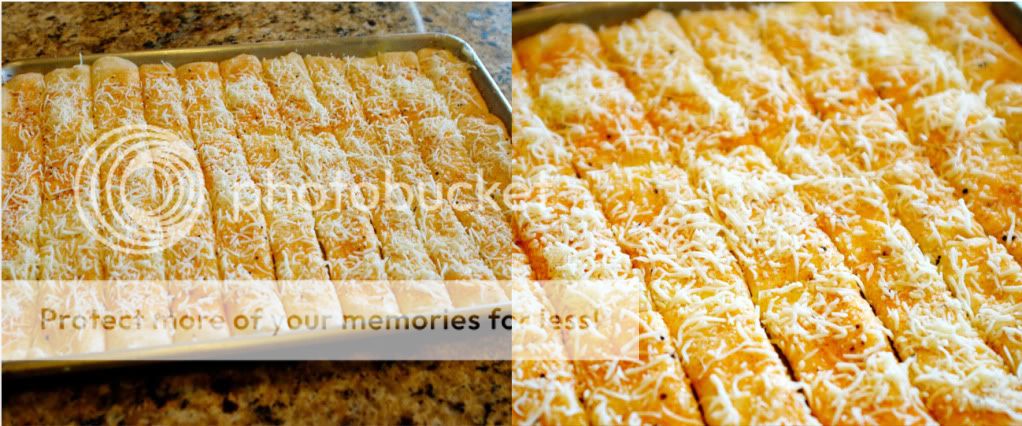
Preheat oven to 500°. Mix dry ingredients together in a large mixing bowl. Add hot water and olive oil. Mix for five minutes and then let the dough rest 10 minutes. Press dough on pizza pan, pizza stone, or jelly-roll pan. Bake at 500° for 3 minutes. It will look like this...

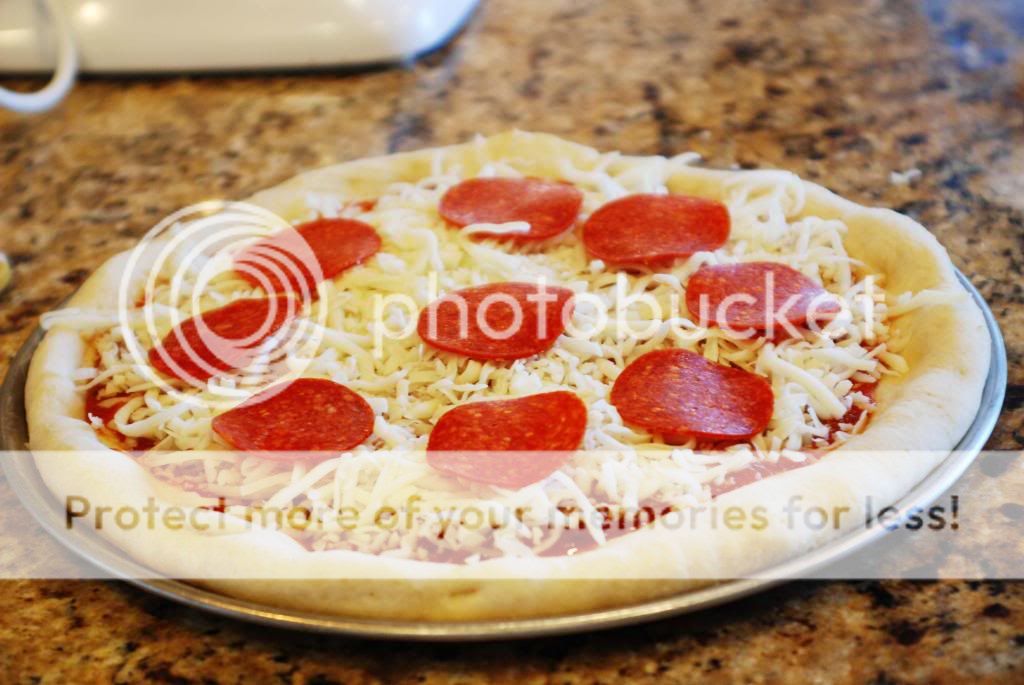
After you take it out of the oven, you can cover it with toppings.

I cheat when it comes to the sauce! I have found an easy solution that my family loves. I use the Hunt's brand "Garlic and Herb" sauce for my pizza. It tastes great, makes it even easier and costs under $1 at Wal-mart!

When you are done adding your toppings, return to the oven and bake 8-10 minutes. I usually just make the traditional pepperoni, but have also done a BBQ chicken which was great. I might have to make this today and experiment!

11/10/2010

Mexican Meat Mix / Chimmichangas

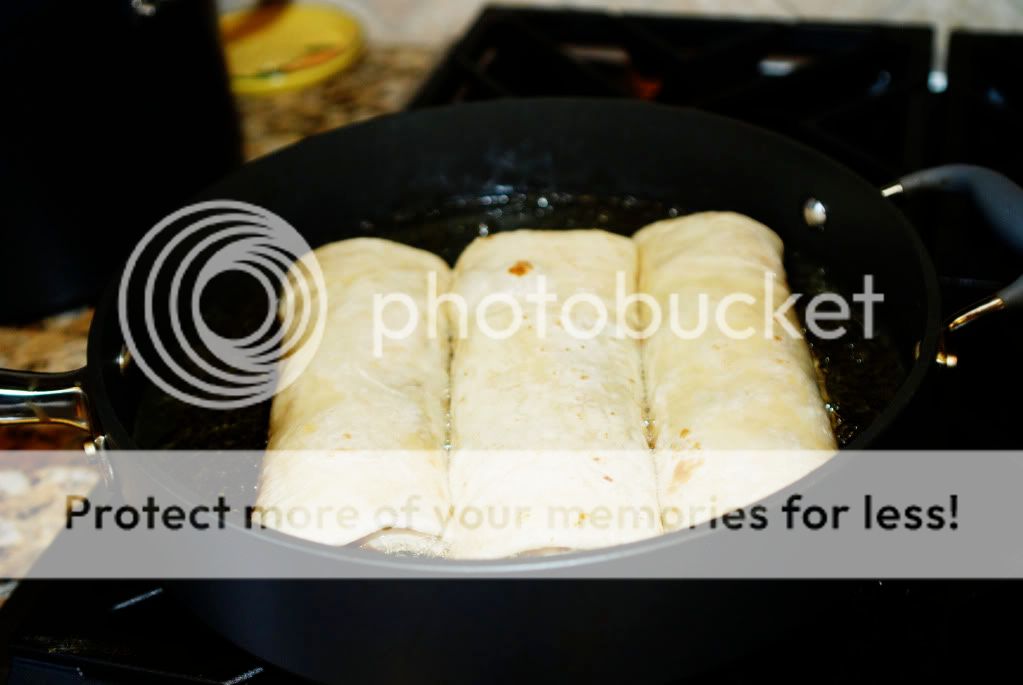
This is my favorite meal ever. No joking. My mom has been making this since I was a little girl. This was what all of the kids in my family picked for their birthday dinner. If I had to pick one dish to remind me of my home growing up, this is it. I love it.

It is from the cookbook titled Make-A-Mix Cookery. It is a great cookbook - that I seem to have borrowed from my mom about 10 years ago - that has many great meals. It is written by 3 moms who were trying to make more time for their families and still make good dinners. They are the original mix makers! They teach you how to make and prepare a mix and make it work for many meals. I found some copies of their book on Amazon if you are interested. Ours is well worn and I think I may break it out again and see what new things I can find!

In this meal, you cook up one large roast and then freeze it in 3 cup portions to make 3 separate meals. Our favorite is the Chimmichangas, but it also makes an amazing Chalupa (thick soup) that everyone loves.

Mexican Meat Mix
5 lbs. beef roast or combination of beef & pork roast
3 Tbs. vegetable shortening
3 onions, chopped
1 (4 oz.) can chopped green chilies
2 (7 oz) cans green chili salsa
1/4 tsp. garlic powder
4 Tbs. flour
4 tsp. salt
1 tsp. ground cumin
Juices from beef roast

Preheat oven to 200 degrees and place the roast in a large roasting pan. Cover with a tight lid and roast about 12 hours, until well done. OR cook all day in crock pot until it shreds easily.

Drain the juices and set aside for later. Cool the meat and then remove any bones. Shred the meat and then set aside.

Melt the shortening in a large pot. Add the onions and green chilies & saute 1 minute. Add the green chili salsa, garlic powder, flour, salt and cumin. Cook 1 minute over medium-low heat. Stir in the reserved juices and shredded meat and cook another 5 minutes, until thick. This will smell so good! At this point, I usually have the chips out for a nice snack!

Cool the meat and put about 3 cups mix into 3 freezer zip-lock bags. Seal, label and use within 6 months.

For the chimmis, we grab a bag out of the freezer in the morning and let it defrost in the refrigerator. Take the meat out of the zip-lock bag and heat up in the microwave. Put a little bit in a tortilla and roll up. I took some pictures of my hubby as he rolled up the tortilla...

Put a little canola oil in a skillet and heat up until popping. Add the rolled up tortillas and then flip them when they are golden.

They should look like this when they are done! SO GOOD! You could always make it a little healthier and bake them instead, but why? They are way to good this way.

Put them on a bed of shredded lettuce and then top with your favorite toppings. We like tomato, cheese, cilantro, green onion, guacamole and sour cream.

You will be glad there are 2 more bags in the freezer!!

11/08/2010

Chocolate Raspberry Cupcakes


I am so excited to be posting again! My computer hasn't been working too well - I had an interim hard drive for months that wouldn't allow me to do anything. I am happy to say that I think it has been fixed and won't happen again. I have to give a big thank you to some of you who have been so nice and written me or posted a note letting me know you are there. A special thanks to Allison, Deborah Brown, Justanordinarygirl & Sara! I am sorry I didn't respond to you guys - I am back now!

I made these cupcakes for a wedding shower over the summer & it got such a great response that I made them again for my husband's birthday. We loved them! They are chocolate cupcakes with a "secret" filling of raspberries. If you like the combination of chocolate and raspberries, then these are for you. Especially with the chocolate cream cheese frosting - anything would taste good frosted with this frosting!

Chocolate Raspberry Cupcakes

1/2 cup (1 stick) butter, room temp

1-1/4 cups sugar

2 large eggs, room temp

3/4 cup flour

1/2 teaspoon baking powder

1/4 teaspoon baking soda

1/4 teaspoon salt

1/2 cup unsweetened cocoa powder

1/2 cup milk

1 teaspoons vanilla

1 cup sour cream

1 cup chocolate chips


Raspberry Filling

2 bags frozen raspberries

1/4 cup sugar


Chocolate Cream Cheese Frosting

8 oz. cream cheese

1 stick unsalted butter, room temperature

1/2 cups cocoa powder, unsweetened

1 tsp. vanilla

4 cups powdered sugar, sifted


Preheat oven to 375F degrees.

Beat butter until softened. Add sugar and beat until light and fluffy, about 3 minutes. Add eggs, one at a time, beating until well combined.

Measure the flour, baking powder, baking soda, salt, and cocoa powder into a small sized bowl and whisk to combine. Measure out the milk, vanilla and sour cream and stir to combine.

Add about a third of the dry ingredients to the butter/sugar and beat to combine. Add about a half of the milk/vanilla and beat to combine. Continue adding, alternating between dry and wet and finishing with the dry. Mix in the chocolate chips.

Scoop batter into cupcake liners 2/3s full. Turn oven down to 350 degrees and bake cupcakes for about 22-25 minutes or until a toothpick comes out clean.

While the cupcakes are cooling, puree the raspberries (leave them a little bit thick) and then mix in the sugar. You can taste the filling to see if it is sweet enough for you and adjust the sugar accordingly. Fill a pastry bag with the filling and put a regular tip on it and place it directly in the center of the cupcake. Press out filling while slowly pulling the bag up and out. It will look like this...

After you are done filling the cupcakes, blend the cream cheese and butter on low until creamy. Add the cocoa, vanilla and sugar on low until moist. Increase the speed and beat until fluffy. Don't forget to sift the sugar! It really makes a big difference in the texture of the frosting.

Pipe it onto the cupcake to cover up the raspberry filling and garnish with a fresh raspberry. They are pretty and delicious!


7/06/2010

Best Cinnamon Rolls!

I started making cinnamon rolls when I was 15. I got a job at a little bakery and learned how to make them from scratch. They are great and I haven't wanted to try any other recipe until I found the Pioneer Woman blog. Her cinnamon rolls are her top rated recipe and they get such great reviews. I knew I had to give them a try.

So, for Fathers Day I made them & I love them. I don't know if I can go back. They are amazing. They make A LOT of rolls, I made 6 tins full (I froze 2 for later.) The dough is light and just melts in your mouth. The frosting is what made it absolutely sinful. I felt like I had made the best donuts ever, it tasted just like donut maple frosting.

It is nice also because you make the dough the night before and then roll them out in the morning. It took me about an hour and a half in the morning from start to bite! I will be making these many more times & can't wait to try them out of the freezer!

I am linking to Pioneer Woman for this recipe. She has amazing step-by-step instructions for you! The only difference I made was not adding the coffee in the frosting, it didn't need it!

Best Cinnamon Rolls Ever!

Pioneer Woman Recipe
Yum!!
Don't they all look pretty!!

Don't skimp on the frosting!!

6/24/2010

No bake cocoa cookies

My kids loves these cookies. I think all kids do. I love them because they are super easy and fast to make and they don't heat up the kitchen. It is starting to get hot, so not turning on the oven during the day is so nice. I think most people have a version of this cookie - here is mine!

No Bake Cocoa Cookie

1/2 cup butter
2/3 cup milk
3 Tbs. cocoa
2 cups sugar
1 tsp. vanilla
3 cups oatmeal

This is all you will need! (I doubled my recipe for this picture, that is why there are 2 sticks of butter.)

In a medium sauce pan, combine butter, milk, cocoa, and sugar. Mix over medium heat until the mixture comes to a boil. Continue to stir for 5 minutes while it is boiling.

Take the pan off the heat, add vanilla and mix in, then add oatmeal. Mix till combined.

On and ungreased cookie sheet, drop a spoonful of the mixture onto the pan. The cookie should keep its form and the chocolate and oatmeal should stay together. If the dough spreads, you will need to keep the mixture on boil for another minute or so. Get them onto the cookie sheet as quickly as you can, sometimes they harden in the pan!

This recipe makes about 2 dozen cookies - perfect to be goobled up in a day!

6/17/2010

7-up chicken

This is my favorite chicken recipe. We have made it since I was a little girl and I still can't get enough. It is so good!! And it tastes great the next day in sandwiches, so we always make lots of extra.

When I was younger my parents made this for a church youth group activity. They put the marinade right into the frozen chicken bags, let them sit for the day and then took the bags to the activity and grilled them there. This recipe can feed a huge crowd (just adjust the marinade to your amount) or for your family. But, seriously make some extra for the next day!

7-up Chicken

1 cup vegetable oil
1 cup soy sauce
1/4 tsp. garlic powder
1 tsp. horseradish sauce
2 cups 7-up
Chicken breasts or tenders - enough to fit comfortably in a gallon zip-lock bag

Mix all the ingredients together and marinade the chicken overnight. The longer the better! I usually put my zip-lock bag on a cookie sheet in the fridge and I try to remember to turn it over every so often. Grill and enjoy!

6/10/2010

Top Ramen Chinese Chicken Salad

One of my very best friends made this for me when I was in High School. I loved it. I made her give me the recipe before I left her house and I have been making it ever since. I wont say how many years that has been! But, it is really one of my favorite meals. Especially this time of year when it is hot and a cool dinner sounds great.

I like this salad also because it seems to taste better the longer it sits and the spices mix together. I usually pan fry my chicken, but you could easily use rotisserie or grilled chicken also. My kids eat this up without any complaints. Actually, they love it too and try to go for the serving with the most top ramen!

Top Ramen Chinese Chicken Salad
Recipe given to me from Cami Stephenson

1/2 head lettuce, cut into bite size pieces
1/2 head cabbage, cut into bite size pieces
3 cups chicken, diced or shredded
2 Tbs. sesame seeds
1/4 cup slivered almonds
2 packages Top Ramen Chicken Soup Noodles, broken into small pieces
2 green onions, diced

Dressing
1 Top Ramen noodle dressing packet
1/2 cup oil
1 tsp. salt
1Tbs. sugar
3 Tbs. vinegar
1 tsp. pepper

Combine all of the dressing ingredients and stir very well. Set aside while you put the salad together.

Add all of the salad ingredients into a large bowl and mix with the dressing. That's it. Sometimes I don't have sesame seeds or almonds & it still tastes great! Enjoy this one!

6/02/2010

Easy Breadsticks


I am not quite sure what to think about the weather lately! I keep having to move the kids clothes around in their closets - short sleeves one day and then long the next. Last week it was actually cold and rainy, when last year at this time it was 100 degrees!

It made me in the mood for some soup and bread. I had stumbled upon a new breadstick recipe that looked quick and good, so I thought I would give it a try. My family LOVED them! And they were honestly the easiest bread recipe I have ever made. You don't have to wait for them to rise and you don't even have to roll them out. I found them at here at Jamie Cooks it up - she has a lot of great recipes!

Easy Breadsticks

1 1/2 C warm water
2 T sugar
1 T yeast
1/2 t salt
3 1/2- 4 C flour
1/4 C butter
3/4 C grated Parmesan or mozzarella cheese
Johnny's Seasoning Salt

Mix the water, sugar and yeast together in a measuring cup or in the bottom of your mixer. Let it sit for 5 minutes until it is all foamy.

Add the salt and the flour, one cup at a time, until it is well incorporated. Mix on high for 5 minutes. Let the dough rest for 5 minutes longer.

Melt the butter and pour half of it onto a large cookie sheet. Place the dough in the center of the pan and let it sit for another 5 minutes so it is easy to shape.

This is the best part! Just spread the dough out flat onto the pan with your fingers until it reaches all of the edges. No rolling necessary.

Pour the other half of the butter onto the breadsticks. Use a kitchen brush or your fingers to spread it evenly over the top. Sprinkle with your favorite garlic spread - I used Johnny's Seasoning Salt - it has a yummy flavor and isn't too heavy on the garlic. Then sprinkle with fresh Parmesan or mozarella cheese. I also made one pan without any seasoning and it turned out great too!

With a pizza cutter cut the dough into your breadstick shapes. Put the pan into a 170 degree oven for about 7-10 minutes. The breadsticks should rise about 1 inch. Turn you oven up to 350 and bake for about 12 minutes, or until golden brown.


They are great warm out of the oven & cold the next day. I have a feeling I will be making these a lot!

5/25/2010

Rocky Road Chocolate Cake


My mom emailed me this recipe a couple months ago and I put it in my file of new things to try. I was completely intrigued by a crock pot cake. And this one had so many yummy things in it, mainly lots of chocolate! I am a crock pot fan, so I knew this was my kind of cake.

I am so glad I tried it! It was so good. It had a really fudgey (is that a word?) texture, which I love. It was warm, gooey and soft. I wasn't sure how much it would make because the batter didn't seem like much when I put it in the crock pot. But it cooked up to the very top! This cake will feed quite a crowd - and make them happy!

Rocky Road Chocolate Cake

1 package German chocolate cake mix
1 3.9-oz. package chocolate instant pudding mix
3 large eggs, lightly beaten
1 cup sour cream
1/3 cup butter, melted
1 teaspoon vanilla extract
3 1/4 cups milk, divided
1 3.4-oz. package chocolate cook-and-serve pudding mix
1/2 cup chopped walnuts
1 1/2 cups miniature marshmallows
1 cup semisweet chocolate chips
Vanilla ice cream (optional)

Beat the cake mix, instant pudding, eggs, sour cream, butter, vanilla and 1 1/4 cups of milk for about 2 minutes until mixed well. Spray the crock pot with Pam and pour the batter in.

Heat remaining 2 cups milk in a heavy non-aluminum saucepan over medium heat, stirring often, 3-5 minutes or just until bubbles appear (do not boil); remove from heat.

Sprinkle cook-and serve pudding mix over batter. Slowly pour the hot milk over pudding so that it stays on top of the batter. Cover and cook on LOW for 3 1/2 hours.

Turn off your beautiful green crock pot and sprinkle the cake with walnuts, marshmallows, and chocolate morsels. Put the cover back on and let it stand 15 minutes or until marshmallows are slightly melted. Spoon the cake into dessert dishes, and serve with ice cream.


The cake may look like it is not completely done, but it if the top is set, then it is done. And it is great!

5/21/2010

Strawberries and Cream Cupcakes

We had a birthday party for someone in our house last week. She turned 5 and loves everything pink! I know it wont last for too much longer (even though I never stop liking pink), so we had a fun pink party. I had printed this recipe out a long time ago to try & thought it would work perfectly. Especially since you can get fresh strawberries right now! These cupcakes use a pound of pureed strawberries - so yummy.

We loved them and they were a big hit at the party! I used one of my very favorite buttercream frostings - it is so good and holds shape forever.


Strawberry & Cream Cupcakes
from Our Best Bites blog

2 3/4 c. all-purpose flour

1/2 c. cake flour

1 Tbsp. baking powder

1 tsp. salt

2 sticks butter, softened

2 1/4 c. sugar

3 large eggs

1 egg white

1 c. buttermilk

1 1/2 tsp. vanilla extract

1 lb. strawberries, pureed

A few drops of red food coloring


Buttercream Frosting

  • 2 cups shortening
  • 8 cups confectioners' sugar
  • 1/2 teaspoon salt
  • 2 teaspoons vanilla extract
  • 1 cup heavy whipping cream


Preheat oven to 350. Line a muffin pan with paper liners. Whisk flour, cake flour, baking powder, and salt in a medium bowl. Cream butter and sugar with a mixer until light and fluffy (about 3 minutes).

Add eggs and egg white, one at a time, beating after every addition.

Reduce speed to low. Combine buttermilk and vanilla together and set aside. Add dry ingredients to creamed mixture in 3 additions, alternating with the milk mixture; end with the dry ingredients. Fold in strawberries. If desired, add a few drops of red food coloring until a pretty pink color is reached. Scrape the sides of the bowl to ensure everything has been mixed in. Divide batter among muffin cups (about 30), filling them almost all the way to the top.

Bake cupcakes until a knife inserted into the centers comes out clean, about 22-25 minutes. Allow to cool in muffin tins.


For the frosting, cream shortening until fluffy. Add sugar, and continue creaming until well blended. Add salt, vanilla, and 6 ounces whipping cream. Blend on low speed until moistened. Add additional 2 ounces whipping cream if necessary. Beat at high speed until frosting is fluffy.


I piped the frosting out with a pastry bag and then sprinkled with pink sprinkles!


5/14/2010

Guacamole Salsa

I went to a church dinner a couple weeks ago and they made shredded pork with an amazing guacamole salsa over it. I loved it! I was so excited when later in the night they had a class teaching us how to make the same salsa!

It is really easy to make and is healthy also. It is made with all fresh vegetables & herbs ( and a pinch of salt.) It can be made thicker like real guacamole or thinner to make it like a salad dressing - and everywhere in-between. I use it to spread on my turkey sandwiches and it has a bunch of flavor without adding any fat. I keep thinking of all the other ways I can eat this - besides with a spoon!

Guacamole Salsa
1 lb. tomatillos (or more if you want it thinner)
1 jalapeno pepper (or more if you like it spicy)
1/3 bunch cilantro
1 thick slice of onion
1 garlic clove
1 avocado
1 tsp. salt


Peel and wash the tomatillos - they are usually found over by the cilantro & peppers, and have a husk on them. Cut them into quarters and put in the blender. Follow with the jalapeno, cilantro, onion, garlic, avocado & salt. Be sure to put the tomatillos in the bottom of the blender and not the avocado so it doesn't stick to the blade. You might have to help it start by shaking or using a mixer at first. But, once it gets going the juice from the tomatillos will help move the other ingredients around.

That is it! I was told it lasts for about a week in the fridge. I did notice that it thickens up in the fridge, so if you want it thinner grab a couple more tomatillos to mix in again. Super easy and so good!!

5/12/2010

Orange Oven French Toast

This is what I woke up to on Mother's day. Yes, my hubby is awesome. He is a great cook and specializes in breakfast food. For some reason he can flip a pancake way better than me! He did such a good job with this breakfast, especially since we had to be to church at 8:30 in the morning!

This meal is made the night before and then put in the fridge until baking, so those busy mornings are made a little easier. I love it because you get a pan full of french toast all at once so the family can actually eat together! They are so good and have a light orange flavor.

Orange Oven French Toast

1/2 cup butter, melted
1/4 cup honey
2 tsp. ground cinnamon
6 eggs
1 cup milk
1 cup orange juice
1/4 cup sugar
2 tsp. grated orange peel
1/2 tsp. salt
1/2 tsp. ground cinnamon
16 slices toast (we like french bread)
2 oranges, sliced

In a small bowl, combine the butter, honey and 2 tsp. cinnamon, mix well. Pour the mixture evenly into 2 ungreased 15x10x1-inch baking pans (cookie sheets).

In a medium bowl, slightly beat eggs. Add the milk, orange juice, sugar, orange peel, salt and cinnamon. Mix all the ingredients well. Dip the bread into the egg mixture and place into the baking pans. Pour any remaining egg mixture over the bread. Cover and refrigerate overnight.

In the morning, pre-heat the oven to 400 degrees. Bake the toast for 10 minutes, then flip and bake for another 10 minutes. Serve with some orange slices!

5/07/2010

7-up Biscuit


I got this recipe from Steph at an awesome site called Plain Chicken. It is a really fun site with lots of great chicken, grilling and other yummy recipes. You should check out all the ways Steph can make grilled cheese - I was completely impressed!

When I saw this recipe on her blog, I couldn't get it off my mind! Seriously, I thought about it for a couple of days and kept wanting to make it for every meal. I finally got to make them and WOW, they are great!! They only have three ingredients and they are soft, fluffy, buttery and the perfect texture. My whole family devoured them quickly. I think I want to make them tonight!

7 -Up Biscuits

2 cups Bisquick
1/2 cup sour cream
1/2 cup 7-up
1/4 cup melted butter

Cut the sour cream into the Bisquick and then add the 7-up. The dough will be really sticky and soft, just sprinkle with a little bisquick mix to make it into biscuits. Melt the butter in a 9 inch square pan (I doubled mine in a 9x13!). Place the biscuits in the pan and bake at 450 degrees until just golden.

5/04/2010

Kookies


I needed to make a treat for cub scouts today, but wanted to do something quick. So, I went to my cookbooks and found a great new cookie recipe. It is from a church cookbook, which I love because it is a compilation of everyone's favorite recipes. They usually turn out well when they are all favorites!

This cookie is actually called Kookie and is really yummy. Double chocolate, with chocolate chips and walnuts - it was almost like a brownie. It made about 5 dozen cookies and took me about 5 minutes to whip up! The kids love them!

Kookies
1 box dark chocolate cake mix
1 box devils food cake mix
1 cup flour
4 eggs
1/3 cup water
1 cup oil
2 cups (16 oz) chocolate chips
1 cup nuts ( I used walnuts)

Preheat your oven to 350 degrees. Mix all of the ingredients together. Make dough into little balls and place on greased cookie sheet. Bake for 8 minutes - DO NOT OVERBAKE! It really makes a difference when the cookies are still soft, promise. That is it! Try not to eat to many.

4/30/2010

Taco Rice

My mom made up this recipe when I was in high school & it was a big hit in our house. Now, it is a big hit in mine. There aren't that many recipes where I get a big smile from each member of the family - some are a little picky. But, when I make this dinner I ALWAYS hear "Thanks, mom!" They get to top it with whatever they like and everyone is happy.

And the best part is how easy and fast it is to make! You can make it quickly on the busy nights and enjoy a great meal. My mom always made it with ground beef and white rice, but since we are trying to eat a little better I tried it a little different last time. I made it with ground turkey and brown rice & couldn't tell any difference!! The kids had no clue.

Taco Rice
1 lb. ground beef or turkey
2 cups (approximately) cooked white or brown rice
1 packet or 1/4 cup taco seasoning
3/4 cup water
2 8 oz. cans tomato sauce

Taco toppings -
chopped tomatoes
cilantro
cheese
onions
avocado
shredded lettuce
salsa
tobasco sauce
Tortilla or corn chips

Brown the meat in a skillet and drain the juices. Add the taco seasoning and water, mix and then simmer for a couple minutes. Add the tomato sauce and rice and then mix well. Heat all the way through.

Serve on plate and top with all of your favorite taco toppings. My husband and I needed a little bit more kick to ours last time (but the kids didn't), so we sprinkled it with a little Tobasco sauce and it was great! We love to eat ours with a handful of chips for a little crunch.