3/08/2012

Hello

I think I need to start out by saying thank you!

I have been trying to figure out how to write this post in my mind over and over for months now. As you can see, it has been a long time since I have written and I felt like it was just too hard to start again. Wouldn't that be weird to have a one year gap between posts? But the entire year & even now, I continue to receive encouraging messages and emails from all of you. Thank you!

My blog started out just as a place for me to document my favorite recipes and share it with family and friends. Now I have met many new friends and you have helped me to realize that I really did like sharing my recipes and making this little blog!

I guess I should start out by explaining why I stopped posting to begin with.

I would like to introduce you to my reason ...

Photobucket

At the beginning of last year, we found out this little blessing was going to join our family. I can't tell you how excited we all were! I was excited for every part of it, except the pregnancy part. I do not do well being pregnant. Food becomes an aversion for me. I don't like the smell of things, the feel, the taste, etc... and everything makes me sick. So, there wasn't much cooking happening in this house last year.

When she was born last fall, I thought things would start getting a little easier. I didn't really think that through!

I would like to introduce you to the 3 reasons that didn't happen...

Photobucket

My new thought is that if you have older kids and then have a baby in the fall - you obviously didn't plan it! With school starting, 2 in soccer, flag football, volleyball, boy scouts, daisy scouts, church activities and all of the other fun things happening it was hard to find time for much! We made it through, but again without the normal routine & cooking.

Now that my sweet baby is 5 months, we are settling into a little bit better schedule. My number one priority is to enjoy every second with her, I want to remember and love each stage.

My list of things to do is a mile long and I have new ideas all the time that just don't get done. But, it is okay. I will have that time for myself again soon. And I think I am slowly figuring things out!

That being said, I am ready to try my blog again! I want to say thank you again to everyone who has written to me and shared their thoughts, opinions, suggestions, ideas & even stood up for me when I wasn't ready to respond. I am going to do my very best to respond to you quickly, I really do value what you think and your suggestions.

I am very excited to continue documenting my favorites & sharing with all of you!

2/22/2011

Buttermilk Pancakes


I made some fun rainbow pancakes for the kids the other day. I have seen pictures of them before and always thought they looked really cool - and they are! The kids loved them. I made them with my favorite from-scratch pancake recipe. It is a version of the IHOP recipe that I found years ago. They are yummy with fresh blueberries added, but almost better plain. My family thinks they are the best!

Buttermilk Pancakes

1 1/4 cups flour
1 egg
1 1/4 cups buttermilk
1/4 cup sugar
1 tsp. baking powder
1 tsp. baking soda
1/4 cup canola oil
pinch of salt

Preheat your skillet over medium heat. Blend all of the ingredients until smooth. Spoon approximately 1/3 cup of the batter onto the skillet. When the edges appear the harden and the bubbles pop at the edges, flip the pancake. Cook on the other side for the same amount of time. - If you add blueberries, you might have to flip a couple times to cook evenly in the center.

If you want to make the rainbow pancakes, start by doubling the recipe. Then, divide the batter into 6 bowls. Add the correct food coloring to each bowl and then stir to get the shade you like. I used a 1/4 cup to drop the batter instead of a 1/3 cup. It makes a little bit more of a mess - but it is fun!


2/02/2011

Black Bean Soup

I saw this recipe a couple weeks ago on Our Best Bites and knew immediately I had to try it. Wow! This soup is so good. Seriously, I licked my bowl. And my spoon. And finished my kids bowls. Then I ate it for breakfast the next morning. I loved it.

Black Bean Soup


1 Tbs. olive oil
4 cloves garlic, chopped
3/4 cup diced carrots
3/4 cup diced celery
1 cup diced onion
2 cans black beans, rinsed and drained
1, 3.5 oz green chilies
2 cans beef broth
1 tsp. kosher salt
1/8 tsp. black pepper
1/4 tsp. cumin
1/2 tsp. oregano leaves
1 bay leaf
tobasco sauce to taste
1 lime

Warm a large soup pot on Medium-High heat and then add the olive oil. Add the carrots, celery, onion and garlic. Saute the veggies for about 5 minutes.

Add the beans, chilies and broth and then stir in the rest of the ingredients. Add as much tobasco sauce and you would like - I put in about 6 good shakes!


Cook uncovered for about 25 minutes, or until all the veggies are soft. Remove the bay leaf and take the pot off the heat.

Place the soup in a blender and puree the soup until it is smooth. The ladies from Our best Bites, suggested removing the stopper on top of the blender to let the steam escape. I used my smoothie maker, so already had a big opening. I did what they suggested and covered it with a paper towel, it worked great!

Squeeze in some fresh lime juice and mix. Serve with tortilla chips, cilantro, cheese & tomatoes.

1/27/2011

Apple Bars

I have been buying a lot of apples lately - partly because they are on sale at Costco & partly because I am loving eating them with peanut butter for lunch. I love the taste of the two together & you don't have the guilt of eating too much bread. Which is my downfall!

I have made this recipe twice in the last week and need to stop now. It is too good to resist & I am trying to put as many into the kids lunches as possible to get them out of the house! These bars are so yummy. They puff up as they cook and the top gets crackly and crisp while the inside is soft and gooey. They have a bit of a fall feel to them, which I always love.

Apple Bars

1 cup melted butter
2 cups white sugar
2 eggs
2 cups all purpose flour
1 tsp. baking soda
2 tsp. ground cinnamon
2 cups peeled, cored and diced apples
1 cup chopped walnuts (optional)

Preheat your oven to 350 degrees and grease a 9x13 pan.

Mix the butter, sugar and egg until creamy. Add in the flour, soda and cinnamon and mix well. Stir in the apples and walnuts. Spread the batter into the prepared pan.

Bake for about 50 minutes, or until a toothpick comes out clean from the center. Remember, the outside will be crispy and look done while the middle might still be gooey!

Enjoy!


1/13/2011

Much Better Now

I am a recipe hoarder. I love to look at cookbooks, magazines and blogs about food. I love to rip out and print all of the recipes that look good to me. And I have a hard time getting rid of them - I might want to try it out soon!

I thought I had a good system down for my recipes, but my printing has gotten a little out of control. I have papers everywhere! I would try some of them out and then stick it into my trusty "binder" but it has become a little bit crowded. This is what my cookbook and recipe cupboard looked like... not good, see all the papers!

I had finally had enough. So while my hubby was out of town this week I started my organizing. I bought a pack of the 1 inch binders at Costco and figured out how I wanted to divide my recipes. I made a super quick cover for the front and one for the spine and then went to work sorting the papers. And I actually threw a bunch away!

I can't ever find any tabs that you can see when you use the page protectors, so I just made my own. I printed out the label on cardstock, cut it out, backed it with the same color page as the divider and then stuck it to the end with packing tape. It looks and works perfect!


I am so happy with how they turned out! They make me want to start baking more and I have so much room for new recipes!


I chose to make 6 binders and divide up my recipes in these categories -

*Bread & Breakfast
*Main Dish
*Cookies & Cakes
*Crockpot & Casseroles
*Soup, Salad & Sides
*To Try

Each of these binders has their own sub-categories also. For example, the Bread & Breakfast binder has a breakfast, quickbread, muffin and bread sections. This is just what works for me!

Much better now, wouldn't you agree?


1/05/2011

Chalupa


Remember when I said the Mexican Meat Mix, which makes my favorite Chimmichangas also makes the best soup? Well, this is it. This soup is so good. I love it because if you already have the meat mix in the freezer, this soup takes no time! Everyone can top it the way they like - I like cheese, cilantro, green onions, shredded lettuce, tomato, avacado & chips. It is perfect for a cold night!

Chalupa
2 cans pinto beans (or black)
4 cups water - or to your desired consistency
1 tsp. salt
1 Tbs. chili powder

Toppings
chips
cheese
green onion
shredded lettuce
cilantro
avacado
tomatoes


Add the beans, water, Meat mix, salt and chili powder in a soup pot. Cook uncovered for approx. an hour, stirring occasionally until it is heated all the way through.

Serve in a bowl over the chips. Garnish with the toppings of your choice. Enjoy!

12/07/2010

Homemade Pizza

One of my very best friends, Stephanie, gave me this recipe. She told me a couple times about this pizza and how easy & fast it was. I wasn't sure what her definition of "easy" was until she told me it takes about 15 minutes to make it! That is my kind of easy. I knew I had to try it too. I have always had a hard time with pizza dough - I never found the recipe that made the kind I liked. Well, I am happy to say that I have an easy, new favorite! I have made this recipe about 5 times now and my whole family loves it. And I love that I can make it quickly - the only thing I need to plan ahead for is to make sure I have mozarella cheese!

Homemade Pizza Dough Recipe

2 1/2 c. flour
1 Tbsp. sugar
1 tsp. salt
1 cup hot water (120-130°)
1 Tbsp. Rapid Rise or Bread Machine yeast
2 Tbsp. olive oil


Preheat oven to 500°. Mix dry ingredients together in a large mixing bowl. Add hot water and olive oil. Mix for five minutes and then let the dough rest 10 minutes. Press dough on pizza pan, pizza stone, or jelly-roll pan. Bake at 500° for 3 minutes. It will look like this...

After you take it out of the oven, you can cover it with toppings.

I cheat when it comes to the sauce! I have found an easy solution that my family loves. I use the Hunt's brand "Garlic and Herb" sauce for my pizza. It tastes great, makes it even easier and costs under $1 at Wal-mart!

When you are done adding your toppings, return to the oven and bake 8-10 minutes. I usually just make the traditional pepperoni, but have also done a BBQ chicken which was great. I might have to make this today and experiment!

11/10/2010

Mexican Meat Mix / Chimmichangas

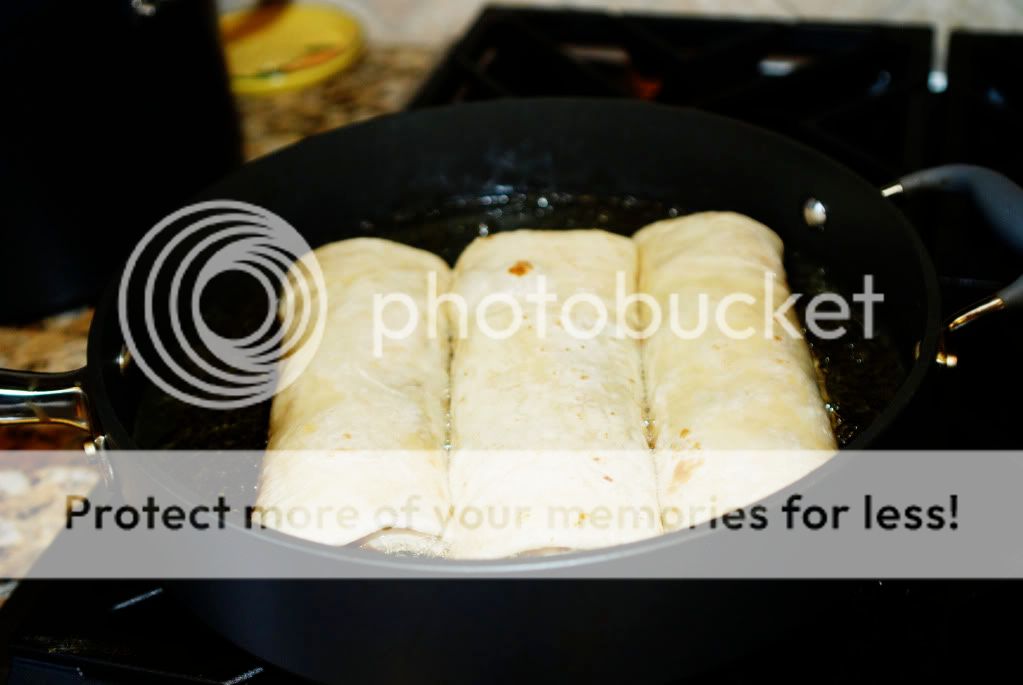
This is my favorite meal ever. No joking. My mom has been making this since I was a little girl. This was what all of the kids in my family picked for their birthday dinner. If I had to pick one dish to remind me of my home growing up, this is it. I love it.

It is from the cookbook titled Make-A-Mix Cookery. It is a great cookbook - that I seem to have borrowed from my mom about 10 years ago - that has many great meals. It is written by 3 moms who were trying to make more time for their families and still make good dinners. They are the original mix makers! They teach you how to make and prepare a mix and make it work for many meals. I found some copies of their book on Amazon if you are interested. Ours is well worn and I think I may break it out again and see what new things I can find!

In this meal, you cook up one large roast and then freeze it in 3 cup portions to make 3 separate meals. Our favorite is the Chimmichangas, but it also makes an amazing Chalupa (thick soup) that everyone loves.

Mexican Meat Mix
5 lbs. beef roast or combination of beef & pork roast
3 Tbs. vegetable shortening
3 onions, chopped
1 (4 oz.) can chopped green chilies
2 (7 oz) cans green chili salsa
1/4 tsp. garlic powder
4 Tbs. flour
4 tsp. salt
1 tsp. ground cumin
Juices from beef roast

Preheat oven to 200 degrees and place the roast in a large roasting pan. Cover with a tight lid and roast about 12 hours, until well done. OR cook all day in crock pot until it shreds easily.

Drain the juices and set aside for later. Cool the meat and then remove any bones. Shred the meat and then set aside.

Melt the shortening in a large pot. Add the onions and green chilies & saute 1 minute. Add the green chili salsa, garlic powder, flour, salt and cumin. Cook 1 minute over medium-low heat. Stir in the reserved juices and shredded meat and cook another 5 minutes, until thick. This will smell so good! At this point, I usually have the chips out for a nice snack!

Cool the meat and put about 3 cups mix into 3 freezer zip-lock bags. Seal, label and use within 6 months.

For the chimmis, we grab a bag out of the freezer in the morning and let it defrost in the refrigerator. Take the meat out of the zip-lock bag and heat up in the microwave. Put a little bit in a tortilla and roll up. I took some pictures of my hubby as he rolled up the tortilla...

Put a little canola oil in a skillet and heat up until popping. Add the rolled up tortillas and then flip them when they are golden.

They should look like this when they are done! SO GOOD! You could always make it a little healthier and bake them instead, but why? They are way to good this way.

Put them on a bed of shredded lettuce and then top with your favorite toppings. We like tomato, cheese, cilantro, green onion, guacamole and sour cream.

You will be glad there are 2 more bags in the freezer!!

11/08/2010

Chocolate Raspberry Cupcakes


I am so excited to be posting again! My computer hasn't been working too well - I had an interim hard drive for months that wouldn't allow me to do anything. I am happy to say that I think it has been fixed and won't happen again. I have to give a big thank you to some of you who have been so nice and written me or posted a note letting me know you are there. A special thanks to Allison, Deborah Brown, Justanordinarygirl & Sara! I am sorry I didn't respond to you guys - I am back now!

I made these cupcakes for a wedding shower over the summer & it got such a great response that I made them again for my husband's birthday. We loved them! They are chocolate cupcakes with a "secret" filling of raspberries. If you like the combination of chocolate and raspberries, then these are for you. Especially with the chocolate cream cheese frosting - anything would taste good frosted with this frosting!

Chocolate Raspberry Cupcakes

1/2 cup (1 stick) butter, room temp

1-1/4 cups sugar

2 large eggs, room temp

3/4 cup flour

1/2 teaspoon baking powder

1/4 teaspoon baking soda

1/4 teaspoon salt

1/2 cup unsweetened cocoa powder

1/2 cup milk

1 teaspoons vanilla

1 cup sour cream

1 cup chocolate chips


Raspberry Filling

2 bags frozen raspberries

1/4 cup sugar


Chocolate Cream Cheese Frosting

8 oz. cream cheese

1 stick unsalted butter, room temperature

1/2 cups cocoa powder, unsweetened

1 tsp. vanilla

4 cups powdered sugar, sifted


Preheat oven to 375F degrees.

Beat butter until softened. Add sugar and beat until light and fluffy, about 3 minutes. Add eggs, one at a time, beating until well combined.

Measure the flour, baking powder, baking soda, salt, and cocoa powder into a small sized bowl and whisk to combine. Measure out the milk, vanilla and sour cream and stir to combine.

Add about a third of the dry ingredients to the butter/sugar and beat to combine. Add about a half of the milk/vanilla and beat to combine. Continue adding, alternating between dry and wet and finishing with the dry. Mix in the chocolate chips.

Scoop batter into cupcake liners 2/3s full. Turn oven down to 350 degrees and bake cupcakes for about 22-25 minutes or until a toothpick comes out clean.

While the cupcakes are cooling, puree the raspberries (leave them a little bit thick) and then mix in the sugar. You can taste the filling to see if it is sweet enough for you and adjust the sugar accordingly. Fill a pastry bag with the filling and put a regular tip on it and place it directly in the center of the cupcake. Press out filling while slowly pulling the bag up and out. It will look like this...

After you are done filling the cupcakes, blend the cream cheese and butter on low until creamy. Add the cocoa, vanilla and sugar on low until moist. Increase the speed and beat until fluffy. Don't forget to sift the sugar! It really makes a big difference in the texture of the frosting.

Pipe it onto the cupcake to cover up the raspberry filling and garnish with a fresh raspberry. They are pretty and delicious!


7/06/2010

Best Cinnamon Rolls!

I started making cinnamon rolls when I was 15. I got a job at a little bakery and learned how to make them from scratch. They are great and I haven't wanted to try any other recipe until I found the Pioneer Woman blog. Her cinnamon rolls are her top rated recipe and they get such great reviews. I knew I had to give them a try.

So, for Fathers Day I made them & I love them. I don't know if I can go back. They are amazing. They make A LOT of rolls, I made 6 tins full (I froze 2 for later.) The dough is light and just melts in your mouth. The frosting is what made it absolutely sinful. I felt like I had made the best donuts ever, it tasted just like donut maple frosting.

It is nice also because you make the dough the night before and then roll them out in the morning. It took me about an hour and a half in the morning from start to bite! I will be making these many more times & can't wait to try them out of the freezer!

I am linking to Pioneer Woman for this recipe. She has amazing step-by-step instructions for you! The only difference I made was not adding the coffee in the frosting, it didn't need it!

Best Cinnamon Rolls Ever!

Pioneer Woman Recipe
Yum!!
Don't they all look pretty!!

Don't skimp on the frosting!!